It's been a long time coming, but we've finally gotten round to cleaning M3 - the large upward-facing mirror at the bottom of the spherical aberration corrector (SAC)! M3 was last cleaned back in 2010, while the SAC was on the ground for the image quality fix. We knew that it had to be costing us in terms of reflectivity & scattering, but we also weren't keen to bring the whole SAC down from the tracker, so we came up with a way to clean it up there instead...
Tech Ops designed & built a new platform + jig for detaching & lowering the mirror into a position that we would be able to clean it in. The whole thing conveniently folds up into a flat structure that's easily lifted with the dome crane.
 |
| Lifting the new M3 platform |
With the payload out of the way, rotating the dome brought the platform to the telescope.
 |
| The M3 platform riding the dome crane en route to the tracker |
Then the platform could be lowered into place near the bottom of the tracker bridge.
 |
| Lowering the M3 platform into position |
Hooks at the top of the platform clamp over a horizontal beam on the tracker bridge.
 |
| Hooking the platform into position |
Guys in the cherry-picker could then install the struts to keep the tread-plate section of the platform horizontal.
 |
| Installing the struts beneath the platform |
Next up was removing the external baffle that encloses the SAC.
 |
| Nicolaas & Timmy removing the lower section of the SAC baffle |
Then the calibration screen & the upper section of the SAC baffle could be detached as well.
 |
| The upper baffle coming down |
With all those bits out of the way, we could get up there & take a closer look at the M3 cell!
 |
| Getting re-acquainted with the SAC |
Lifting the sleeve around the SAC cage gave us a glimpse of a Very dusty M3!
 |
| A dusty glow from the bottom of the SAC |
Some careful aiming through the SAC cage showed the extent of the dirt on the mirror surface.
 |
| M3 central baffle still in place |
Next we removed the plate below M3 (known as the "pizza pan") to extract the central baffle, which would afford a better view up through the central hole.
 |
| Pizza pan & central baffle removed |
This allowed us to get a look at M2 (up above M3) & with that, the bad news: the M2 coating has degraded considerably in the 10 years since we last got to see it... The entire surface is now riddled with sparkly pinholes :(
 |
| The M2 coating that has failed |
Since there was nothing we could do about M2 at this stage, it was time to get on with detaching M3. First up, we checked that the epoxy locking all of the M3 adjusters was still in tact.
 |
| M3 tie rods still securely locked with epoxy |
& since all of the bolts around the flange have washer shims to set the exact spacing, those were each numbered & the respective gaps measured with feeler-gauges.
 |
| Each bolt has its own shim to set the spacing around the flange |
Next we took at closer look at the two dowel pins that would had to be pushed out with a custom-made tool before the bolts around the flange could be removed. To our great relief, we found that the tool could indeed move the pins quite easily.
 |
| Jono testing the dowel pin removal tool |
After getting the jig carefully lined up with the M3 cell, we needed to move the tracker slightly to fine-tune the position & that's when the trouble started. The anti-gravity drive (yes, there really is such a thing, though it's not as exotic as it sounds!) that applies a constant upward force to support the weight of the prime focus carriage decided to stop co-operating. It took the rest of Monday & most of Tuesday to get the tracker back in action. The timing actually couldn't have been better, as that allowed those of us involved in the re-alignment of the 1.9-m to finish up that job before diving into the nerve-wracking M3 clean.
 |
| Etienne (electronics), Paul (software) & Eben (mechanical) looking for the problem inside the igloo that houses the electronics for the tracker drives |
Thanks to the Tech Ops team for hunting down the solution, allowing us to get back up on the platform on Wednesday morning with the tracker fully operational!
 |
| Gearing up to detach the M3 cell |
More measurements were made to ensure that the cell was appropriately centred on the jig.
 |
| Jonathan & Eben measuring the position of the cell on the ring |
Having optimally positioned the jig & tracker, we could attach the three clamps that axially squeeze the bottom flange of the M3 cell to the aluminium ring of the jig. Care was taken to avoid having the clamps radially contact the cell, as that could transmit forces to the mirror's tangential attachment points and risk causing misalignment.
 |
| Clamps attaching the M3 cell to the aluminium ring of the jig |
With the dowel pins easily pushed out, the bolts were loosened & all the washers captured with cable ties to ensure that none of them got away. That got us to a point where the M3 cell appeared to be held on with cable ties :) Everyone was waiting to see how the jig would react to taking the weight of the 73 kg assembly, but it was a total non-event! The first we knew was when we noticed a small gap having opened up between the two flanges, the three sets of springs & linear guides had done their job brilliantly :D
 |
| M3 seemingly attached with cable ties! |
Jonathan could then proceed to slowly jack the ring down using the hydraulic ram, thereby lowering the M3 cell from the SAC. With the gap opened up a bit wider, the initial set of cable ties could be replaced with ones securing the washers to the top flange. Then the jig+cell was free to descend...
 |
| M3 emerging |
SALT Astronomer (SA) Rudi was up on the catwalk with a camera at the time, so below is a view of the action from the far side of the dome.
 |
| As seen from the catwalk |
It was a real pity that Craig Sass (from the mechanical workshop in Cape Town) couldn't be here for this as planned - but thanks to John Booth for providing a replacement set of mechanical hands on the platform.
 |
| M3 had landed safely so it was photo time! |
Having the cell horizontal allowed us to get a proper look at the filthy surface.
 |
| It shouldn't be a golden colour... |
The Perspex cover was secured in place, making it safe to gawk at the mirror & marvel at how easy it had been to detach the M3 cell.
 |
| Did that really Just Work?! It didn't even put up a fight! |
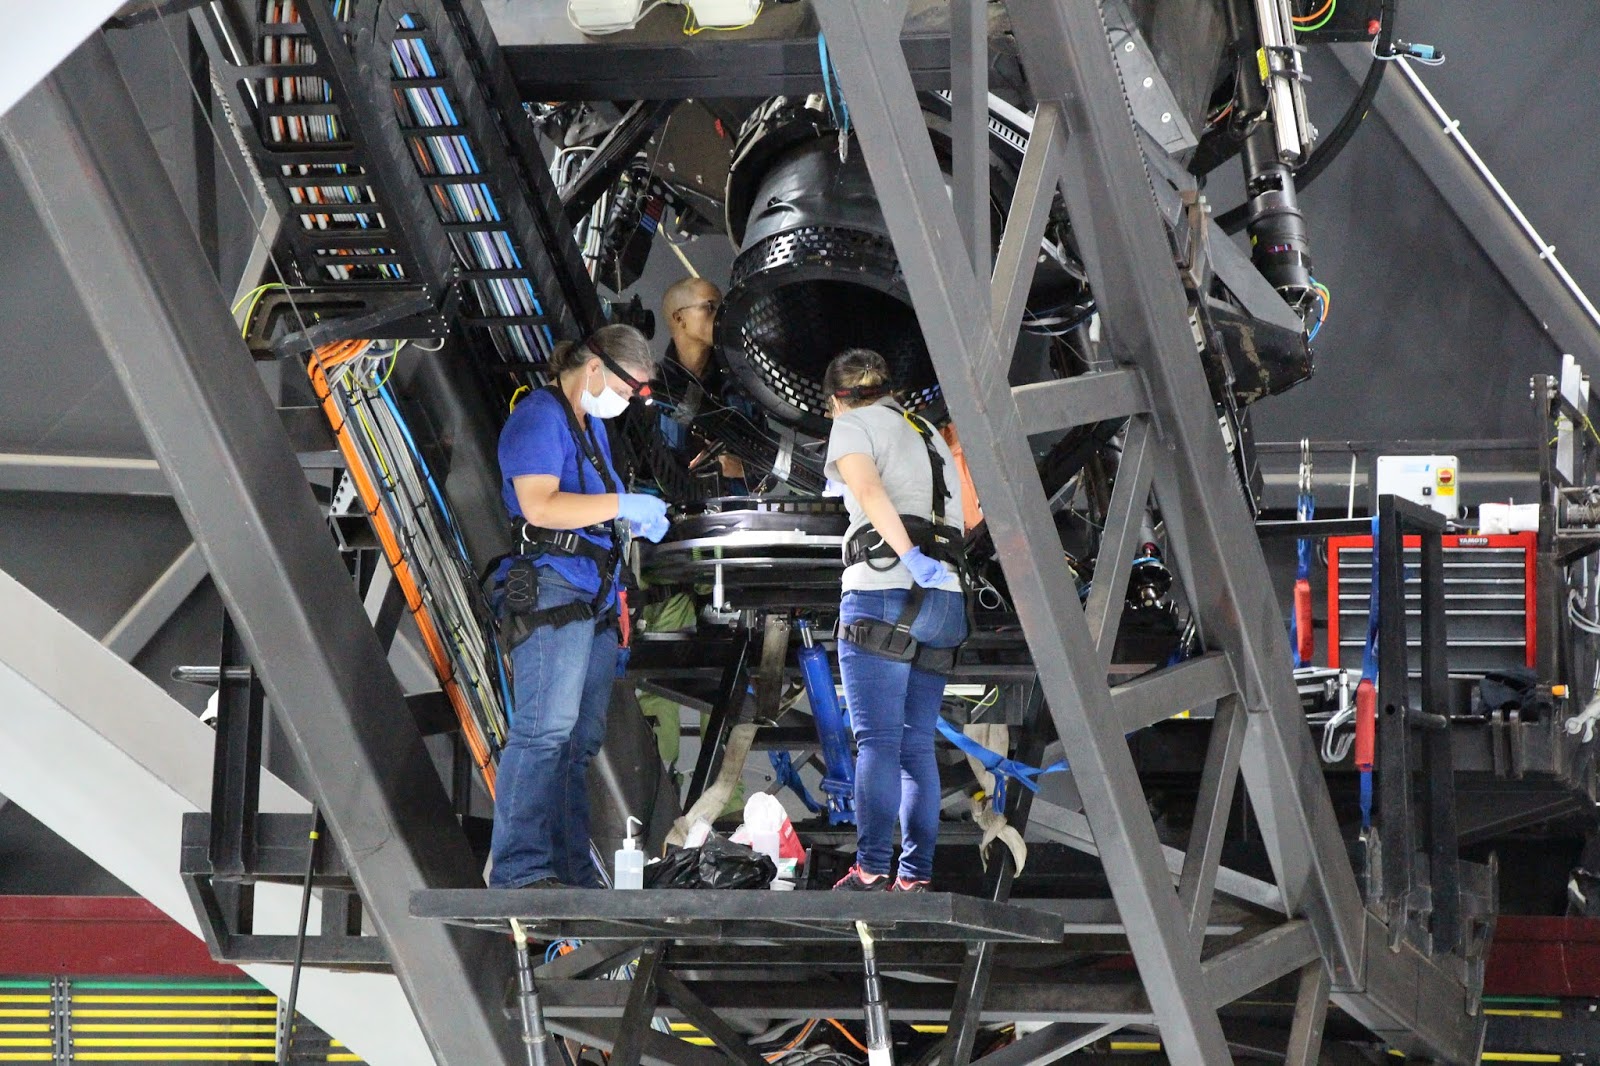
With that, it was time to send in the cleaning crew...
 |
| Here's optical engineer Melanie putting her rope-access training into practise |
We took loads of photographs before changing anything.
 |
| Lisa taking "pre-clean" photos |
The baffle around the outer edge of the mirror clearly provided a lot of protection - maybe we need a much bigger baffle to protect the whole surface?!
 |
| This is an odd image, the mirror isn't really convex! |
Next we removed the small ring baffle that surrounds the central hole.
 |
| Other than the protection provided by the two baffles, the dust was evenly distributed over the whole surface |
After taking plenty of photos, we set the CT-7 reflectometer loose on the dirty mirror. We took data in three radial zones each for the 3, 6, 9 & 12 o'clock positions. Each click yields reflectivity & scattering measurements at the device's seven LED wavelengths, at 325, 375, 468, 523, 660, 850 & 940 nm.
 |
| Reflectivity measurements were of order 70-80%, but the scattering values were high (in the 30-60 unit range) |
The first step in the cleaning process was to blow off any loose material using a bulb puffer.
 |
| Chasing dust around with air |
Then we did a trial-clean on a small area of the mirror out at the outer edge, where we might expect the coating to be most vulnerable. The surface cleaned up well & there was no sign of degradation at all, so that gave us some degree of confidence that we'd be able to clean the whole surface.
 |
| Relief that the trial-clean at the edge of M3 yielded no sparkly bits on the cotton swabs |
Then we branched out & cleaned a whole sector, checking frequently that the coating was still holding up.
 |
| Carefully cleaning the first sector |
The process used to successfully clean M5 in August 2016 was repeated - starting with dabbing the surface with Webril Handi-pads that had been wet with de-ionised (DI) water. Once the sector was sufficiently wet & the dust had been mobilised, we switched to dabbing the surface with swabs carrying a sodium laurel sulphate (SLS) + DI water solution (also known as horse soap). Having removed all visible dirt, we used the SLS solution to drag-wipe the surface - being careful not to apply any downward pressure besides the weight of the wet swab. Many more DI water swabs were then used to "rinse" away the soap before using pure cotton wool makeup wipes to dab the surface dry. The lint from the wipes could then be blown away using the bulb.
 |
| First sector, having been wet, washed, drag-wiped & rinsed |
The improvement was quite striking!
 |
| First clean sector after being dabbed dry & having the lint blown off |
Having watched the process, Melanie then set about cleaning her own sector...
 |
| Carefully wetting a new sector with DI water |
At no stage did we see any worrying signs of the coating misbehaving, happily it is still in extremely good condition...
 |
| Two sectors done with no sign of trouble |
Once again, here's a view from Rudi's perspective over on the catwalk.
 |
| Making the most of the limited real estate up on the platform |
Having each done a sector, we couldn't resist going for a radiation symbol!
 |
| Our M3 radiation &/or dust warning sign |
Working together & with our confidence in the surface steadily growing, we were prepared to tackle larger areas at a time.
 |
| Cleaning a relatively large area at once |
The aspheric surface of M3 produces thoroughly fascinating reflections!
 |
| Not a straight line to be found |
A compelling demonstration of the effect of the cleaning process.
 |
| The last dirty sector |
Working in tandem like this is a great way to go, we got through this considerably larger mirror in about two hours, two thirds of the time taken for a solo clean of M5.
 |
| Teamwork paying off |
Having finished the cleaning we spent a good while taking photos of the intriguing reflections off the beautiful surface & looking for signs of any problems.
 |
| Clean M3 photo binge |
The pic below shows a straight cable tray reflecting exotically in M3.
 |
| More funky reflections off of M3 |
With the cleaning & photographing complete, we did another comprehensive set of reflectivity & scattering measurements all over the mirror. The typical reflectivity was found to be in the 80-95% range, while the scattering values were down to <3%.
 |
| Having had its feet cleaned, the CT-7 could take "after" measurements |
Exhausted after standing up there for most of 5 hours in total, we snapped a few tourist shots before clambering back over to the tracker maintenance platform & heading down to Earth.
 |
| The relieved & exhausted mirror washers stole a selfie off M1 |
The next day we returned to make a few more measurements & to try to inspect M2 more closely.
 |
| Spot the gruesome reflection off of M2! |
Looking up from the mirror yielded another really unusual view - of the rest of the SAC, the non-rotating structure, the carriage & all of the assorted cabling.
 |
| The blue glow seemed to be due to the flash bouncing off of the nitrile gloves holding the camera |
It was extremely awkward to effectively levitate in order to reach up to M2. But we really wanted to get a closer look, & also to check whether the coating is loose or not.
 |
| Not actually sitting on M3 - more like extreme side-planks, with a half twist |
The surface looks truly horrendous - it lights up as shown below wherever you illuminate it. But thankfully the surface is still sound, the damage must reside within the deeper strata of the multi-layer coating.
 |
| Illuminating M2 with a bright light produces awful haloes of scattered light |
John's long arms were invaluable for getting the CT-7 up to the surface of M2 in an attempt to get reflectivity & scattering measurements. If the results are to be believed (given that the device ought to stand stably on a surface during the course of a reading), the reflectivity seems to be approximately 90%, while the scattering is in the 10-15 range.
 |
| Maximally awkward reflectivity measurements |
Having made all the reflectivity & scattering measurements we could, & eventually exhausting the reflectometer batteries, it was time to get the mechanicals onto the platform to re-install the mirror.
 |
| Making some mechanical measurements for the mini-tracker feasibility study before putting M3 back |
The cell almost went back to exactly where we wanted it, but some gentle persuasion was needed to allow all of the 24 bolts & the 2 dowel pins to go back into their respective holes. Along the way, Eben figured out a counter-intuitive adjustment that gave the team the extra degree of freedom they needed to align the flanges without having to resort to the risky option of moving the tracker. The dowels actually went back in surprisingly easily & then the bolts were progressively tightened, in a specific sequence, to torques of 4, 10 & ultimately 16 Nm.
 |
| Reversing the removal process to re-install M3 |
The re-installation took about two hours in total - something we'd happily have paid money to guarantee at the start of this whole episode! Given that this was the first time that the M3 removal & re-installation process had been attempted at angle (during the SAC repair work, M3 was detached with the SAC vertical), never mind that everything was done >15m above the floor - this entire exercise was an overwhelming success.
 |
| With M3 back in place Jono re-measured the gap all around the flange |
Having gotten the M3 cell reattached to the SAC, the "pizza pan" & its associated central baffle was reinserted.
 |
| Putting back the "pizza pan" + central baffle |
In order to render the telescope operationally safe for the necessary on-sky tests, the guys had to temporarily rig up the cables & radio plugs that make up the hexapod envelope limits, but without the outer SAC baffle in place.
 |
| Adjusting the cables & radio plugs to set up the hexapod envelope limits |
We were fortunate to have great conditions at the start of the night: a clear, dark sky with 1.2" seeing. Superstar SALT Operator Fred did an primary mirror alignment so that we had a fresh stack to work with, & then SALT Astronomer Rudi found us a great field to point to for our through-focus test. We focused the full-frame SALTICAM image & could immediately see that things looked extremely good - uniform, sharp stars across the entire field.
 |
| Excellent image quality across a beautiful 10 arcminute field |
The real test though was not the best-focus image, but rather the far-out-of-focus version, which would clearly show coma if M3 had not gone back to its nominal position. We stepped through a number of focus values & the image below shows a +2 mm offset beyond the best-focus position shown above. If M3 had been misaligned, we'd easily have been able to correct for 0.01 deg (36") of tilt & 100 microns of decentre using the auto-collimator offsets. But, in fact, we did not need any adjustments to the auto-collimator offsets - the even light distribution across the individual out-of-focus star images showed that M3 was not misaligned at all. Likewise for the -2 mm focus position.
 |
| Yet more beautiful: even light distributions for out-of-focus star images across the entire field, indicating that M3 was not misaligned at all |
Cleaning M3 up on the tracker was a long-standing goal & an extremely daunting task. Everyone on the SALT Ops team, + Craig Sass, Melanie Saayman & a couple of members of the SALT Scientific & Technical Committee (John Booth & Matt Bershady), played their parts in making this happen, & being an extraordinary success. Particular credit goes to Jonathan Love & Eben Wiid for their heroic efforts in developing a brilliant jig + procedure, & then for being in the hot-seat to make all this work superbly when the time finally came. Credit too to Paul Rabe for creating an environment conducive to tackling such challenging & fundamentally important endeavours. Thank you Everyone - Great Job!!
Congratulations on a great job!
ReplyDeletecongratulations.. well done.
ReplyDeleteCongratulations on a great job team SAAO/SALT
ReplyDeleteFantastic! Well done Lisa and the team!
ReplyDeleteCongratulations!Fantastic work by all involved!
ReplyDeleteAwesome - what a team! Congrats -
ReplyDeleteAlan.
Amazing post with lots of useful information. Well done!. Keep Posting.JRW Cleaning Solutions
ReplyDelete"Your Article is Good
ReplyDeleteExternal Cleaning"